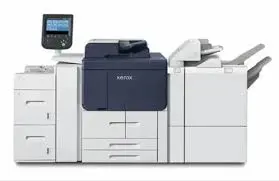
Configuring General Scan Service Settings
SETTING SCAN DEFAULTS
To define scanning default settings for all users:
1. At the device control panel, log in as Administrator, press the Machine Status button, then touch the Tools tab. For details, refer to Administrator Access at the Control Panel.
2. Touch System Settings > Scan Service Settings > Scan Defaults.
3. To change a default setting:
a. Touch a default setting, then touch Change Settings.
b. Change the default setting, then touch Save.
4. Touch Close.
CONFIGURING OTHER SCAN SETTINGS
To define other scanning settings for all users:
1. At the device control panel, log in as Administrator, press the Machine Status button, then touch the Tools tab. For details, refer to Administrator Access at the Control Panel.
2. Touch System Settings > Scan Service Settings > Other Settings.
3. To change a setting:
a. Touch a setting, then touch Change Settings.
b. Make the appropriate change, then touch Save.
4. Touch Close.
SETTING SCAN TO PC DEFAULTS
To define default Scan to PC settings for all users:
1. At the device control panel, log in as Administrator, press the Machine Status button, then touch the Tools tab. For details, refer to Administrator Access at the Control Panel.
2. Touch System Settings > Scan Service Settings > Scan to PC Defaults.
3. In the list, touch a default setting, then touch Change Settings.
4. Change the following settings as needed:
• Transfer Protocol: Touch FTP, SMB, or SMB (UNC Format).
• Login Credential to Access Destination: To use the user name and password of the remotely authenticated user for login, touch Remotely Authenticated User.
• User Name for FTP Scan: If you selected Remotely Authenticated User for the Login Credential to Access Destination setting:
• To use only the user name for login, touch User Name Only.
• To use the full login credential name for the user, which includes the domain name, touch Add Domain Name.
FAQs
How do I improve scan speed on the PrimeLink® C9065/C9070?
To improve scan speed on the PrimeLink® C9065/C9070, try the following steps:
1. Optimize Scan Settings: Reduce the scan resolution or use lower quality settings if high resolution is not needed. This can speed up the scanning process.
2. Update Firmware: Ensure your printer’s firmware is up-to-date to benefit from the latest performance enhancements.
3. Check Document Quality: Make sure documents are clean and free of wrinkles or jams, as these can slow down scanning.
4. Use Automatic Document Feeder (ADF): Utilize the ADF for faster scanning of multiple pages instead of placing each page manually.
5. Perform Regular Maintenance: Keep the scanner and its components clean and in good condition to avoid slowdowns caused by dirt or wear.
By following these tips, you can help ensure your PrimeLink® C9065/C9070 scans more quickly and efficiently.
What are the best scan resolution settings for optimal document quality on the PrimeLink® C9065/C9070?
For optimal document quality on the PrimeLink® C9065/C9070, use the following scan resolution settings:
1. For Text Documents: Set the resolution to 300 dpi (dots per inch). This provides clear and sharp text without unnecessarily large file sizes.
2. For Detailed Graphics or Images: Use 600 dpi for high-quality scans with fine details and accurate color reproduction.
3. For Archival or High-Resolution Needs: Opt for 1200 dpi if you require very high detail and quality for archiving or professional presentations.
Adjust the resolution based on the specific needs of your document to balance quality and file size effectively.
Can I automate scan workflows on the PrimeLink® C9065/C9070 to boost efficiency?
Yes, you can automate scan workflows on the PrimeLink® C9065/C9070 to boost efficiency. Here’s how:
1. Set Up Scan Jobs: Create and save preset scan jobs with specific settings for different tasks, such as scanning to email or network folders.
2. Use Job Templates: Customize job templates for repetitive tasks, allowing you to start scans quickly with predefined settings.
3. Leverage Workflow Automation: Integrate with workflow software or solutions that automate the scanning process, including document routing and storage.
4. Configure One-Touch Scanning: Set up one-touch buttons on the printer for frequently used scan settings, reducing the time spent configuring each scan.
These features help streamline your scanning process and improve overall productivity.
What file formats are best for large-volume scans on the PrimeLink® C9065/C9070?
For large volume scans on the PrimeLink® C9065/C9070, the best file formats to use are:
1. PDF: Ideal for documents as it maintains quality and is easy to manage and share. Use PDF/A for archiving large volumes of documents.
2. TIFF: A good choice for high-quality scans with detailed images. TIFF files are large but provide excellent image fidelity.
3. JPEG: Suitable for images where file size is a concern. JPEG compresses files, but be aware that it may reduce image quality slightly.
Choose the format based on your needs for quality and file size, and consider PDF for documents and TIFF for high-resolution images.
What file formats are best for large-volume scans on the PrimeLink® C9065/C9070?
To reduce the file size of scanned documents on the PrimeLink® C9065/C9070 without losing quality, try these steps:
1. Adjust Scan Resolution: Lower the resolution to a suitable level for your needs. For most text documents, 300 dpi is often sufficient.
2. Use Compression Settings: Enable compression options in the scan settings. Formats like PDF allow for adjustable compression to balance file size and quality.
3. Select the Right File Format: Choose efficient formats like PDF for documents, which can reduce file size through compression, while maintaining quality.
4. Optimize Document Settings: Use settings like grayscale instead of color if color is not necessary, as this can reduce file size significantly.
5. Enable Image Optimization: Use any built-in image optimization features to reduce file size while preserving essential quality.
These steps help ensure your scanned documents are smaller and more manageable without sacrificing quality.

